


Mastering The Art Of Installing Wall Plugs For Secure Installations
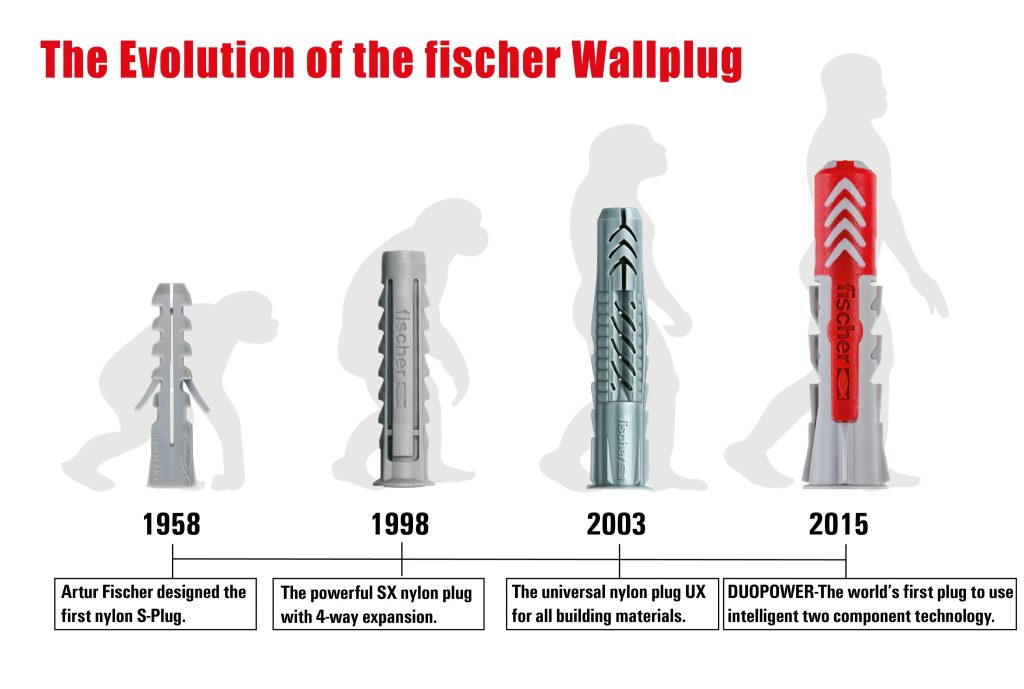
In the realm of DIY and home improvement, some things remain timeless, holding steadfast even as design trends evolve. The expanding wall plug is a prime example, introduced by Artur Fischer in 1958 and still widely used today by both DIY enthusiasts and builders to hang mirrors, curtain rods, blinds and to install shelves, picture frames, cupboards, cabinets, and many more. Though the design has seen refinements over the years, the core principles of how to install a wall plug remain unchanged and can mean the difference between that mounted TV staying fixed for years to come, or it falling down because of an incorrectly installed wall plug. In this post, we’ll guide you through a step-by-step process on how to select the correct wall plug, screw diameter, length, and drill bit to ensure a secure and dependable installation for all those home improvement projects you’re working on.

Things To Consider When Selecting and Installing a Wall Plug
While wall plugs may all look alike in your hardware store it’s important to note that not all fasteners perform alike. Cheap plastic plugs may look like any other on the shelf, but you want to be sure that the plug you’re using is made of high-quality nylon that has been designed to stand the test of time and guarantee that the weight it is advertised to carry is met. When deciding which wall plug to use for your installation be sure to check the weight that the plug can carry. Another factor to keep in mind is not only selecting a high-quality nylon wall plug that can carry the weight of the object being installed but also ensuring you’re installing the fastener correctly.
STEP 1 – Choose the Right Plug Diameter:
Before diving into the installation, it’s pivotal to determine the appropriate plug diameter. Remember that the load-bearing capacity of the plug increases with its diameter. Choose wisely based on your intended application and load requirements.
For example, if you’re installing a shelf that will carry books and the total weight of the books and shelf will be 14kg then you must select a wall plug that guarantees it can carry this weight. fischer plugs provide details on the KN or weight that it is guaranteed to carry on the packaging, so in this example, a DuoPower 6 x 30 wall plug and screw can carry the following load in different substrates:
| Plug Diameter | Recommended Screw Size | Building Material | Load |
|---|---|---|---|
| Ø6mm Plug | 4-5mm Screw | Solid Brick | 0.50 KN – 50 KG |
| Ø6mm Plug | 4-5mm Screw | Concrete | 0.95 KN – 95 KG |
| Ø6mm Plug | 4-5mm Screw | Perforated Brick | 0.15 KN – 15 KG |
By considering the building material and the weight that needs to be held and how many fixing points there are, you can select the right wall plug size and save money by possibly selecting a smaller fixing that is stronger than the alternative plugs available in-store.
STEP 2- Matching Screw and Plug Sizes:
The relationship between the plug diameter and the corresponding screw size is pivotal for a successful installation. Refer to the following table for guidance:
| Plug Diameter | Recommended Screw Size |
|---|---|
| Ø6mm Plug | 4 – 5mm Screw |
| Ø8mm Plug | 4.5 – 6mm Screw |
| Ø10mm Plug | 6 – 8mm Screw |
| Ø12mm Plug | 8 – 10mm Screw |
STEP 3 – Calculating Screw Length:
Step 4: Drilling The Hole:
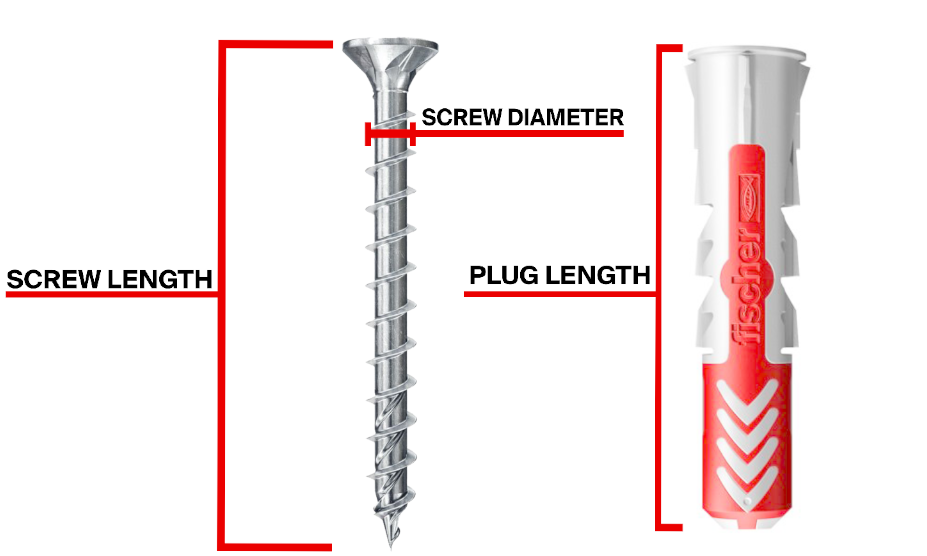
Precise calculations for screw length are vital to ensure optimal stability. Here’s how to do it:
- Measure the fixture thickness (e.g., 20mm)
- Measure the plaster thickness (e.g., 12mm)
- Measure the screw diameter (e.g., 6mm)
- Determine the plug length (e.g., 40mm)
Combine these measurements: 20mm + 12mm + 6mm + 40mm = 78mm.
To err on the side of caution, always round up to the nearest suitable length—say, 80mm.
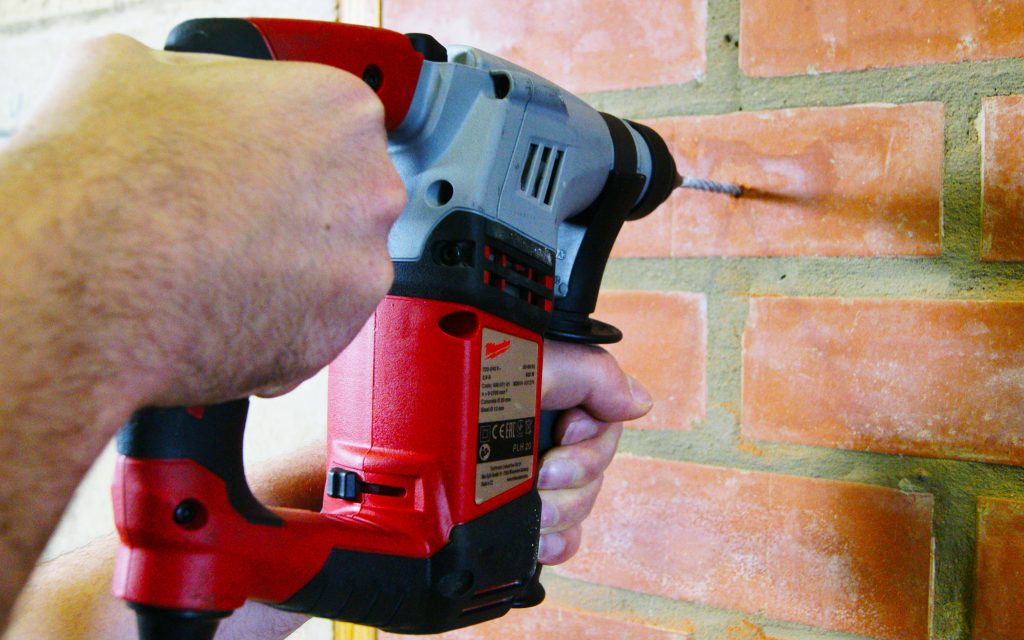
Utilise a drill bit with the same diameter as the plug to create a hole in the substrate. Say for example your wall plug has a Ø6mm diameter, your drill bit but be the same size. When drilling ensure the hole is at least 10% deeper than the plug’s length to facilitate a snug fit.
STEP 5 – Inserting the Plug:
STEP 6 – Positioning the Fixture:
Once the hole has been drilled gently insert the plug into the hole, ensuring it is adequately seated without premature expansion in the plaster. If the plug isn’t flush with the surface, you’re on track.
Position the fixture over the plug, aligning it accurately. Insert the screw into the plug, exercising care not to push the plug deeper into the hole.
STEP 7 – Turning the Screw:
With the fixture in place, gradually turn the screw using a screwdriver. Refrain from using a hammer, as it can compromise the plaster’s integrity and overall installation quality.
*PRO TIP:
DuoPower Plugs for Thick Plaster:
For exceedingly thick plasterwork, consider employing long versions of DuoPower Long plugs, available in 6mm, 8mm, and 10mm sizes. These plugs offer additional stability for dense materials and provide higher weight-bearing capabilities.
Not all wall plugs are created equal, particularly in terms of material. fischer employs 100% nylon, a choice that delivers superior performance compared to plugs made from alternative cheaper materials like plastic that degrade over time causing them to lose their load-bearing capabilities.
In an ever-changing world of design, the fundamentals of using nylon plugs and screws for secure installations remain steadfast. By diligently selecting the right plug diameter, matching it with the appropriate screw size, and meticulously following the step-by-step installation procedure, you can rest assured that your fixtures will stand firm for years to come. Remember, mastery lies in understanding the basics, and in doing so, you’ll achieve installations that endure the test of time.