Chemical Anchors: Explanation & Uses
Chemical anchors are bonded anchors that are used for fixing into concrete and masonry applications. They are a great solution for fixing into solid substrates, offering superior strength and reliability without the need for mechanical expansion which could undermine the strength of the building material and the ultimate holding power of the anchor. Chemical anchors provide an excellent bond between the anchor and substrate, making them ideal for use in high-stress applications such as seismic zones or high wind areas and safety-critical applications where extremely high loads need to be guaranteed.
Chemical anchors are also resistant to corrosion and chemical attack, providing long-term reliability in harsh environments. Chemical anchors offer greater flexibility when compared to traditional mechanical fasteners, allowing for installation in difficult-to-reach locations or through existing structures.
The range of fischer Chemical fixing solutions have different properties suiting them to different applications and to meet different requirements. This means that whatever your fixing requirement is and the installation environment, there is a product ideally suited to ensure a secure installation that will stand the test of time.
How To Install Chemical Anchors?
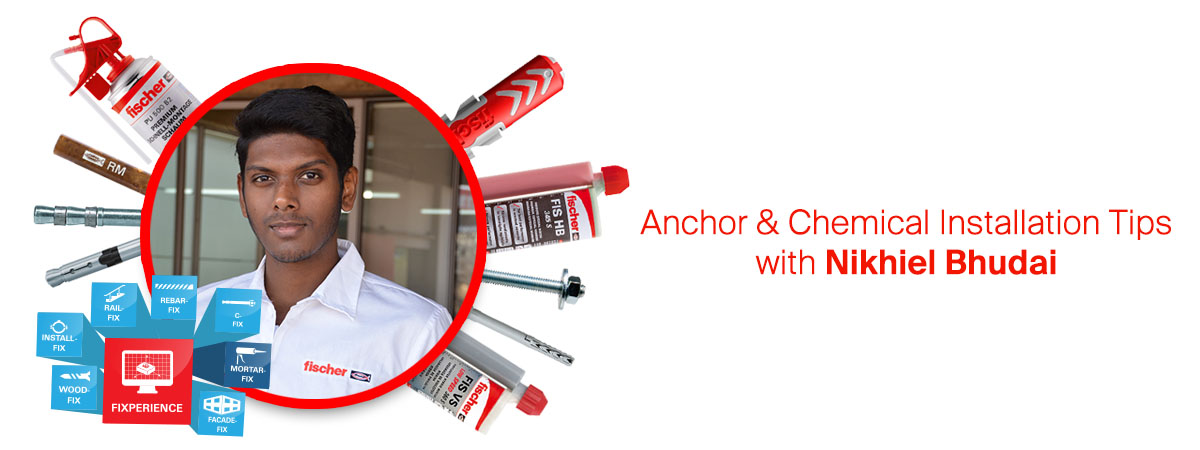
In order to ensure a secure anchor installation that will not only meet the required load-bearing requirements but will also stand the test of time the correct installation procedure must be followed. In this article our Engineer and Technical Manager, Nikheil Budhai will detail how to correctly install a chemical mortar and anchor rod to the highest safety standards, providing you with tips and installation advice to get the installation done quickly and correctly.
Chemical Anchors: Installation Tips:
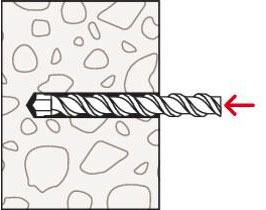
- Drill hole diameter: Ensure that the correct drill hole diameter is used. Generally, the drill hole diameter is 2 – 4 mm larger than the stud’s diameter.
- Drill hole depth: This will be specified in the fischer technical catalog or on the product packaging and if not followed will affect the load-bearing capacity of the chemical fixing.
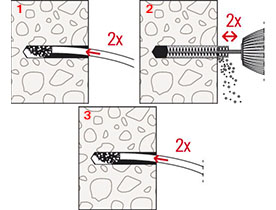
- Hole cleaning: It is imperative that the drill hole is properly cleaned using a wire brush and blow-out bulb to remove excess drilling dust.
*failure to clean the drill hole correctly will greatly reduce the load-bearing capabilities of the anchor once installed
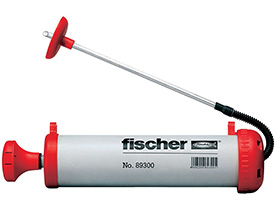
- Blow-out pump – fischer’s blow-out pump is a manual pump with a cap that directs the dust away from the user. Due to the high blow-out pressure, this pump ensures that the holes are reliably cleaned. Furthermore, the pump is fitted with a sealing washer to ensure that concrete dust doesn’t enter the pump. This function allows for multiple re-uses.
*ensure you blow out the drill hole 2-time alternating between using the cleaning brush and pump action
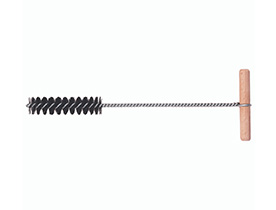
- Cleaning brushes – fischer’s wire cleaning brushes are used in conjunction with the blow-out pump to ensure proper hole-cleaning. The steel brushes are fitted with stainless steel bristles which are approved for hole cleaning in concrete and masonry. Brushes are either manually used or fitted onto a drill for easier use.
*ensure you brush out the drill hole 2-times alternating between using the cleaning brush and pump action
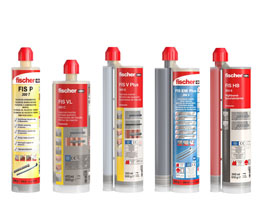
- Use the correct chemical: fischer has different chemicals that are approved for different applications.
fischer’s FIS P – Polyester Injection Mortar is approved for use in non-safety critical indoor masonry applications and cannot be exposed to moisture or wet environments.
fischer FIS V – Vinylester Injection Mortar is approved for use in concrete and masonry with fast setting and curing times and is considered the universal mortar suited for structural and safety-critical applications.
fischer FIS EM – Epoxy Injection Mortar is approved for use in concrete and masonry and offers the highest load-bearing capabilities making them ideally suited to safety-critical applications. Epoxy mortars offer higher load-bearing capabilities than vinylesters, and can be applied in both wet and dry conditions and even under water.
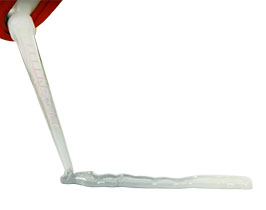
- Preparing the chemical: It is important to ensure that the chemical mixes correctly prior to inserting it into the hole. fischer’s chemical mortar are supplied with mixing nozzles which ensure that the chemical mixes in the correct proportions. To ensure your chemical is mixed correctly, squeeze out some chemical onto a test area before inserting it directly into the drill hole
*there will be a noticeable colour change when fully mixed
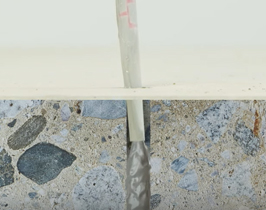
- Inserting the chemical: fischer’s chemical tubes are a two-component cartridge system that works with a dispensing gun.
For every cartridge size, fischer offers a wide selection of manual dispensers to ensure a professional and effective installation. The cartridges are placed into the dispenser and the mortar is squeezed out by pulling the lever to complete the installation. A silicone dispensing tool would work for single-component cartridges (like FIS P).
Note: using fischer’s Mortar Fix app will allow you to calculate the correct amount of chemical to be used without wastage. The app calculates volumes of chemicals used per hole, and per project.
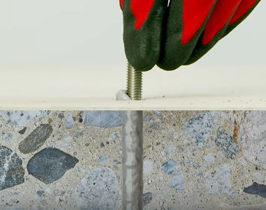
- Inserting the stud: It is recommended to twist the stud into the drill hole to ensure that the chemical is bonded tightly onto the stud (in between the threads).
Note: when installing a chemical anchor into a hollow building material an anchor sleeve must be used in conjunction with the chemical mortar and anchor rod.
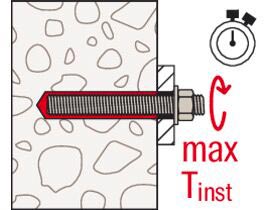
- Fastening the bolt: Follow the recommended product curing and hardening times as recommended on the fischer chemical mortar cartridge. The curing and hardening times are dependent on the ambient temperature.
The above tips and guidelines will ensure your fixing is done correctly and that your installation is safe. It is important to ensure that any chemical and anchor installation is always done correctly to avoid any failures that could lead to loss of life or complete project failure which may cost millions.
We hope that in your next installation, you will follow the correct procedure and ensure that your final fixing is done accurately. In our next article, we will dig deeper into the different types of available chemicals and their intended functions, this will help you get a basic understanding of Chemical Mortar and its role.


